Blender already has a few add-ons to generate plant or tree objects, notably IvyGen and Sapling and recently I added a general L-system add-on into the mix. In this post I present a new add-on that creates trees based on the space colonization algorithm by Adam Runions.
A new kind of tree
Documentation for this add-on now has its own page.
The
GitHub repository now serves version 0.0.4 which makes it possible to define the shape of the crown with groups of objects. Details can be found in
this follow-up article.
The
GitHub repository now serves version 0.0.3 which allows more than one leaf per internode and has a control to determine how much these leaves are clumped. Note that the oft maximum of leaves is still 1.0, if you want more, click and alter the value by hand.
The
GitHub repository now serves version 0.0.2 which adds the ability the enable the generation of new endpoint markers while the tree is generated. This will allow for bushier trees with extra small twigs on the main branches
[Some additional sample trees are
near the end of this article] Because
IvyGen is limited to climbing shrubs and
Sapling requires a fair amount of user interaction to get nice results, I thought it would be interesting to explore the possibilities of generating trees with the space colonization algorithm as described by
Adam Runions.
This algorithm models the growth of a tree by letting branches compete for resources (think light) as they grow. The distribution and density of these resources control the final shape and the algorithm lends itself easily to adapt to environmental influences like walls blocking light etc. a feature that comes in handy when doing architectural modelling for example.
In the first version of this add-on many features are already available but it is not yet a finished tool. Any remsrks and criticisms are welcome of course. This article describes how to install and use the add-on but does not give an in depth account of its design or underlying principles, that is left for a later article. I do present some example images with their parameter settings to get you started.
The code is available on
github. Just download the latest zip from the
release directory and install the add-on with
File->user preferences->addons install from file by pointing it to the zip file. You can then toggle the checkbox to use it (It is in the Add Mesh category as SCA Tree Generator). Remebr to uninstall the add-on first if you installed an earlier version by clicking the remove button.
Creating a tree
To add a tree, position your 3d cursor where you would like the tree to grow and select
Add->Mesh->Add Tree to Scene. A small tree skeleton will appear and in the toolbar on the left of the 3d view will be a number of options. (Press T if the tool bar isnt visible) User interaction is copied from IvyGen so changing the values of options doesnt have an immediate effect but new values are applied when you click
update tree. This is necessary because generating larger trees can take quite some time and if that was attempted on each value change the add-on would become unusably slow.
An overview of all the options is available with the source, here we just highlight the more important ones.(tip: before you start experimenting it might be a good idea to check the
no modifiers checkbox because the tree trunk is given substance by the skin modifier and will take many seconds on larger trees}
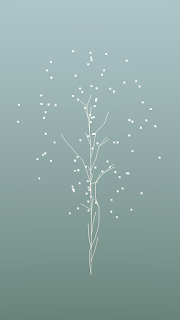
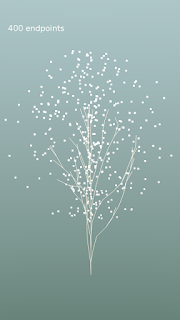
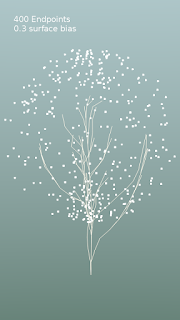
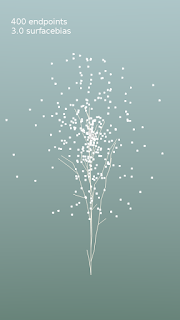
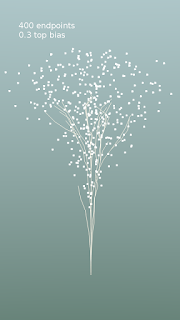
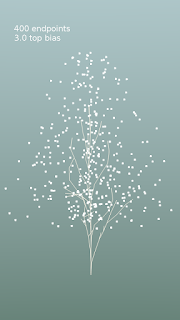
The whole idea of the space colonization algorithm is to populate a volume (an ellipsoid in our case) with markers and let a growth point (at the the 3d cursor) start growing in the direction of the nearest markers. As a growth point (called internode or branchpoint in the add-on in a not entirely botanically correct fashion) approaches a marker close enough, this marker is removed and subsequent growth is in the direction of a slightly different set of nearest markers. A branchpoint can have any number of markers in its sphere of influence but conversely a marker has only a single closest branchpoint. Because of that branches may develop sideshoots (read more on this in the original article)
This means that the number of markers and their distribution are the crucial parameters in determining the shape of the final tree,(tip if you check the
show markers option in the debug panel, the markers that were generated at the start of the tree generation will be visualized as small tetrahedrons. That way you get a clear picture of their distribution. This feature is used in most images that follow.)
Some example trees and their marker distributions
Note that only the parameters that differ from their defaults are shown in the picture.
Few endpoints vs. many endpoints
Near central axis vs. near surface
More endpoints near the top
Mix and match
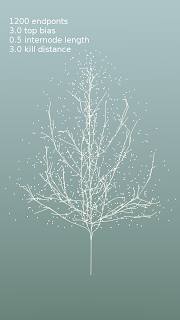
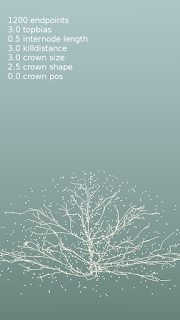
Even shrubs are possible as shown on the right.
adding leaves
When you click the
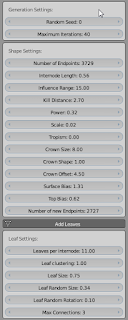
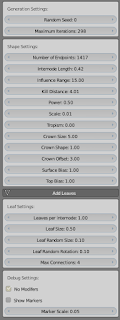
add leaves button a new panel with options will appear with controls for the leaves. The
number of leaves controls the probability that an internode (branch segment) carries a leaf. The size and size variation of these leaves can be controlled, as well as the variation in orientation of the leaves. The
number of connections option controls how much old wood carries leaves. If you set this to 1 only new twigs will carry leaves.
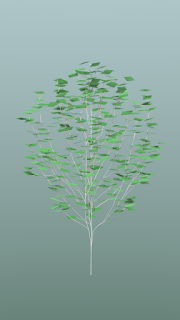
Shaping the branches
When you click on the
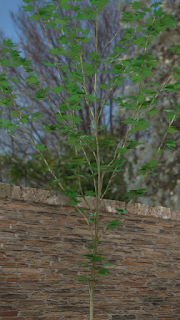
add modifiers option, three modifiers are added to the trunk skeleton (shown in the opening image of this article):
- a subsurface modifier to smooth the branches,
- a skin modifier to give volume to the branches and
- another subsurface modifier to smooth this skin.
Note that calculating these last two modifiers may take many seconds or even minutes if the tree is complex!
The thickness of the trunk and branches and the way the thickness of forking branches is combined is controlled by the
Scale and
Power options respectively.
Environmental influence
A final feature of this add-on that almost comes naturally with the space colonization algorithm is the ability to factor in environmental influences. For example if one side of the growing tree receives more shadow than the other side due to a wall or building, that side will grow less. We can easily mimick this by not placing any markers in a shadowed area. To accomplish this the add-on checks whether any of the markers is generates is inside any of the selected mesh objects in the scene and discards them if they are. The workflow is then:
- select one or more objects (first image below)
- position the 3d cursor where you want the tree to start
- tweak any options
- update the tree
The result (with markers) is shown in the second image below.
Note that we did not select the actual wall, but a larger duplicate (that we will not render), because the shadow influence normally extends beyond the wall and because a new branch might still pass through this exclusion zone towards markers that are above it. By chosing a wider volume we prevent those branches to pass through the actual wall.
Limitations
In this first version there will undoubtably be any number of bugs. One of the most annoying issues is that when the kill distance is chosen too small, a developing branch may terminate in a myriad of tiny segments. This will not only take an enormous amount of time when adding the skin modifier but will also cause a strange clump of hundreds of leaves at that point.
Another thing is that even when not actually generating new geometry, the user interface is sometimes slow when modifiers are selected. I have a hunch this might be related to Blender keeping track of this complicated geometry in its undo cache but I am not sure.
Of course there is also plenty of room for functional improvements: it would be nice if you could select more than one starting point for example to create hedgerows etc. and also have arbitrary objects instead of square leaves, but those are nice to haves for the future.
Some more examples
The following images show the same type of tree as the opening image of this article, but at more mature stages:
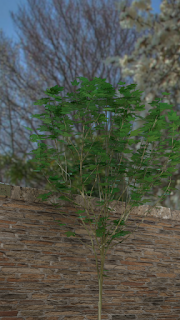
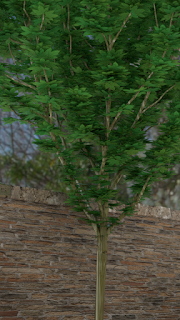
The masked leaf texture as well as the concrete and brick textures are from
cgtextures.com, the latter two converted to various types of specular and bump maps with the free
shadermap commandline tool. The hdri-background is
Alex Harts Arboretrum in Bloom.
The most mature tree was generated with the settings shown below: